“…And I pray that you, being rooted and established in love, may have power, together with all the Lord’s holy people, to grasp how wide and long and high and deep is the love of Christ.”

Ephesians 3:17-18

Wednesday, April 6, 2011

5 Cup Cookie Bars


These cookie bars are a lot like Seven Layer Bars. They are very rich and delicious and oh so simple to make. I think they will be my new go to recipe when I need to take something to a covered dish or party.
Ingredients:
1 stick of butter, melted
1 cup graham crackers, crushed
1 cup chocolate chips
1 cup butterscotch chips (or peanut butter chips)
1 cup chopped pecans
1 cup flaked cocoanut

14 oz can condensed milk
Heat oven to 350. Mix melted butter and crushed graham crackers. Press into bottom of 13x9 pan. Layer the rest of the ingredients in order. Pour whole can of condensed milk over top of all.Bake for 15-20 minutes or until golden brown. Let cool 30 minutes. Slice and server!      

Wednesday, March 16, 2011

SwaddleMe

Baby C slept so well his first few weeks of life because we swaddled him every time he napped and at night.  As he got a little bigger and stronger he began kicking out of the small swaddling blankets, so we tried using a SwaddleMe that had been given to us as a hand-me-down.  Once placed in the cotton SwaddleMe, our nights of peace and quiet returned (except for the expected night feedings).  As Baby C grew, so did his SwaddleMe collection...I think we have 4 of them now.  A lot of babies will sleep just fine without being swaddled, but many like the warmth and security the wrap provides.
Baby C - 17 days old

Tuesday, March 15, 2011

Little Man is Two!

I can't believe my Little Man is 2 years old already! I know it's cliche, but they really do grow up so fast.
He had a wonderful time at his party. We are blessed with a large family so our home was full with grandparents, great-grandparents, aunts, uncles, cousins and close friends. We had been having beautiful spring weather the week before the party so I had reserved a pic-nick shelter at the park for the party, but the weekend of the party was rainy and cold. But it didn't dampen the party spirit!

Little Man loves trains! Each time he recieved a train he would have to run to his room to play with that train before opening anouther gift. It was fun to see him acctulay open his own gifts this year.


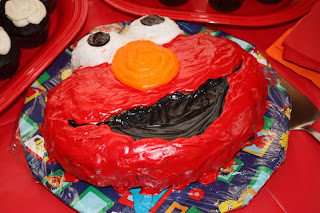
I made Little Man's cake and cupcakes. The cake turned out cute, but the cup cakes were the real hit! 


He loved being the center of attention when everyone sang “Happy Birthday” to him!
It was a great day celebrating the anniversary of Little Man’s birth and spending time with so many loved ones!
Naomi

Monday, March 7, 2011

Olan Mills Birthday Club

Get a FREE picture package from Olan Mills on your child birthday! Sign up for Olan Mills Birthday Club here.

I signed Little Man up!

Friday, March 4, 2011

Broccoli & Cheese Soup

As the leaves changed this past fall, so did my appetite for soup. I am so glad that I have a new attitude towards soup because I was definitely missing out before. During the winter months I probably made at least one pot of something yummy each week, eating it for dinner the day it was made and then freezing the rest in a freezer bag for a meal the following week. This worked out really well because we weren’t eating left over soup for three days straight…which definitely gets boring.
One of my favorite soups is Broccoli & Cheese Soup and what’s even better is that this recipe is so EASY! This will make a huge pot of soup, so invite some friends or family over to enjoy a delicious bowl. (This easily makes 2-3 meals for me and my husband).
Ingredients
  • 2 large packages of frozen chopped broccoli
  • 1 (48 ounce) carton of chicken broth (or use chicken bouillon cubes & water)
  • 6 tablespoons butter (or margarine)
  • 1 onion, chopped
  • 1/2 cup all-purpose flour
  • 2 cups milk
  • 1/2 pound processed cheese food (Velveeta), cubed
  • 1/2 pound sharp cheddar cheese, cubed
  • Salt & Pepper
Directions
  1. In a large pot over medium heat, simmer the broccoli in the broth until tender.
  2. In a separate skillet over medium heat, melt the butter, and add the onions and sauté to desired tenderness.
  3. Add the flour to the onions and stir well, forming a pasty substance. Gradually add the milk and stir until thick.
  4. Add the flour/milk mixture to the broccoli mixture in the pot and stir well. Then add the cheese, stirring until melted. Finally, add the salt & pepper.
  5. Turn down the heat to low and let simmer for 15-20 minutes to let all the ingredients fuse together.
Enjoy!
Kristen

Tuesday, March 1, 2011

Simple Homemade Hummus

1 can garbanzo beans
1 1/2 Tablespoon lemon juice
1 Tablespoon olive oil
1 teaspoon  minced garlic
1 teaspoon cumin
1/8 teaspoon salt
1/4 teaspoon black pepper
2 Tablespoons water

Mix first 7 ingredients in a food processor. Slowly add water while food processor is running. You may not need to add all the water, just add a little at a time until the hummus is smooth.

The great thing about this recipe is that you can adjust the spices to suit your taste. I have used less lemon juice and added lemon pepper instead of black pepper. I have substitute Great Northern Beans for garbanzo beans and this tasted great, but was a little thinner.

I hope you enjoy and have fun making this recipe your own.

Naomi

Monday, February 28, 2011

"Thank You Momma! Thank You, Thank You!"

About this time last year I decided to start weaning Little Man because he was turning one. I had mixed feelings about weaning him, but I felt like I should because it’s just what most people do. And by most people I mean most people who breastfeed through the first year, which is not most people, but any way… I began cutting out feedings one at a time with a plan to have Little Man completely weaned within a month or two.
The first thing to go was pumping at work. This was an easy one for both of us. I was glad to stop carrying that pump back and forth and Little Man was already taking a bottle during the day so switching the bottle to whole milk was not difficult.
The next feeding to go was the early morning feeding which I had been doing before I left for work each day. This went pretty easily. Little Man started sleeping in and I could leave for work before he woke up. This got us down to the after school feeding, before bed feeding, and middle of the night feeding (which I would have loved to have said goodbye to months before.) And this is when it got difficult.
I did not want to let go of the after school feeding because this was our time to snuggle and reconnect. I could sit quietly holding Little Man, let work go, and refocus on the needs of my home. Get ready for job number two so to speak.  So I decided to wait until summer break before ending this feeding.
When summer came it was actually quite easy to eliminate this afternoon feeding because we were so busy playing and going that we just didn’t need it any more.  And then we were down to two- before bed and middle of the night. I really would have loved to stop that middle of the night feeding, but obviously if that were going to be easy to do I would have done it long ago, so the next feeding to go was before bed. At this point my plan of weaning in one to two months had become four months and we still weren’t there. 
Each night I began to try to give Little Man a bottle instead of nursing and each night he cried and fought the bottle and would not give up until I gave in and nursed him. I was feeling frustrated. “He’s just too big for this,” I told myself, “I’ve got to be firm and not give in.” 
So, determined to stand my ground, we began another nightly battle. Little Man did not want the bottle. He began patting my chest (his signal that he wanted to nurse.) No, I told him. Tapping harder. No, again. Tears.  Heart melting. I gave in and began readying to nurse. Relief spread across his face. He looked at me, “Thank you Momma! Thank you!  Thank you!” he said and began to nurse. My resolve was gone. I would not try to wean him. It would happen when it happened. In that moment it was all worth it: engorgements, mastitis, sleep deprivation, worry, anxiety, nursing bras, pumps, breast pads, all of it. And what so many women had told me was true; I loved nursing and I did not want to stop. In the beginning I had thought these women had to be liars (or crazy), but now I knew what they had meant. There is no great gift I could have given Little Man and in that moment there is no greater gift he could have given me. “Thank you Momma! Thank you! Thank you!”
(Just to let you know, Little Man did eventually stop nursing a few months later on his own and with much less stress for both of us.)

Naomi

Tip – Reusable Shopping Bags

I have used cloth shopping bags for about 2 years now.  I have my green Harris Teeter bags and a couple of random plain canvas bags.  When I first started trying to use them I had a hard time remembering to take them with me, but these days it is second nature and I grab them as I head out the door to go shopping.  Every now and then I forget them and beat myself up over the 4-5 plastic (if at Wal-Mart or Target) bags that I will have to use (hopefully they offer paper), but again that doesn’t happen too often.  

I know that using cloth/canvas bags is pretty popular these days, but in case you haven’t joined the bandwagon, I really encourage you to.  Plastic bags take an incredible amount of time to break down (if they ever really do).  I found this small article interesting: The Good Human.com
 
Maybe carrying these bags is the hip thing to do these days, but cloth bags usually hold a lot more too and don’t fall apart as you are hauling your groceries in from the car.  I have four bags and most of the time they fit all my items during my weekly shopping trip.  I am far from being a “Mother Earth” type, but I have tried to make a few small changes to my family’s choices in hopes of being more responsible in taking care of this beautiful planet that we have been given to live on.

Friday, February 25, 2011

Quick Delicious Rolls


We Southerners know that mayonnaise is a staple ingredient in anything from salads to casseroles. Admittedly it’s not the healthiest thing to eat, but it is the secret to making these rolls so easy and so delicious.

2 cups self rising flour
4 tablespoons mayonnaise
1 cup milk
1 teaspoon sugar

Mix all ingredients for 2 minutes. The consistency of the dough will change and be sticky. Spoon into greased 12 cup muffin tin. Bake 10 minutes or until golden brown at 425.


Wednesday, February 23, 2011

Microwave Meatloaf

When my husband and I got married, my Mother-in-law gave me a few recipe cards with some of her most loved (by everyone in the family) dishes.  One of those is Mama Kim’s Favorite Microwave Meatloaf.  I will admit, this recipe collected a little dust, just sitting in my recipe book for a couple of years because I was too scared to attempt cooking a meatloaf in the microwave…I’m a little weird about meat and I want to know that it is super duper well cooked. One night my husband pulled the recipe book out and decided that he was going to make his Mama’s meatloaf for me and sure enough he did and it was INCREDIBLE!  I still make my meatloaf in the oven, but whenever we want a hearty home cooked meal and we are short on time and/or my hubs wants to fix a good supper, we get this recipe out. 

P.S. We often half this recipe and it turns out really well and is plenty for 3 people.

Enjoy!
Kristen
(Image Credit:http://deliciouscheapmeals.com)
 Ingredients
1 can (8oz) tomato sauce
¼ c. brown sugar
1 tsp. prepared mustard
2 eggs, lightly beaten
1 medium onion, minced
½ c. cracker crumbs
2 lbs. lean ground beef
11/2 tsp. salt
¼ tsp. pepper

Directions
1. In a small bowl, combine tomato sauce, brown sugar, and mustard – mix and set aside.
2. In a large mixing bowl, combine eggs, onion, cracker crumbs, ground beef, salt and pepper. 
3. Add 1/2 cup of the tomato sauce mixture to the ground beef mixture and stir.
4. Place the meat mixture in a glass dish/ 2qt. round casserole dish works well. 
5. Pour the remaining tomato sauce mixture over the meat.
6. Cook uncovered on HIGH in the microwave 12-14 minutes.   
Let stand5-10 minutes before serving.
(Approximately 6 servings)

Thursday, February 17, 2011

Homemade Red Sauce

Homemade Red Sauce
This is super easy, plus it is cheaper and healthier.  I think this recipe produces about 2 jars of the store bought sauce and I usually stretch it to last two or three meals.  I will be honest, while this is yummy right when you make it, I think it tastes even better a day or two after being able to combine. Try it out with Naomi's Ravioli Bake - Delicious!


Ingredients
2 (14.5 ounce) cans stewed tomatoes
1 (6 ounce) can tomato paste
4 Tablespoons chopped fresh parsley
1 clove garlic, minced
1 teaspoon dried oregano
1 teaspoon salt
1/4 teaspoon ground black pepper
4 Tablespoons olive oil
1/3 cup finely diced onion
1/2 cup white wine (or chicken broth)

Directions
1. In a food processor or blender, place stewed tomatoes, tomato paste, chopped parsley, garlic, oregano, salt, and pepper. Blend until smooth.
2. In a large skillet over medium heat sauté the onion in olive oil for 2 minutes. Add the blended tomato sauce and white wine.
3. Simmer for 30 minutes, stirring occasionally.

Wednesday, February 16, 2011

Camelbak Water Bottle

"We Love it Wednesdays!" Each Wednesday we are going to share our favorite things with you: baby and toddler products, great finds, deals and freebies, and even indulgences for momma.
My friend Kate gave me my Camelbak Water Bottle and it is absolutely one of my most prized possessions.  It has served me well - in the last few months of pregnancy and now as a breastfeeding mother who consumes what feels like gallons of water a day.  I also really love this water bottle because the company is helpful and has great customer service.  After having the bottle for about 3 months, the mouth piece broke (not a common issue) and I contacted the company via e-mail and within a week I had a new mouth piece and a sweet apology note. -Kristen

Ravioli Bake (or as Little Man calls it, Olio)


This was an instant hit from the very first time I made it. I can’t remember where I got the recipe to start with, but I have made some variation of this dish once every few weeks since. Most of the time I make it meatless (the way I prefer it) and sometimes I make it with meat (the way my hubbie prefers it).

Little Man loves it too!

I love this meal mostly because it is so delicious, but also because it is quick, easy, and versatile. Bear with me as I share the recipe. If you like exact measurements you may have difficulty, but give it one try and you will see why I leave so many choices up to the cook.

Ground Italian sausage or ground beef (optional)
1 large package of frozen ravioli (large or mini)- do not thaw or cook
1 can of your favorite pasta sauce
1 bag of fresh spinach (or even better- Kristens's homemade pasta sauce!)
Any veggies you want*
1 large bag shredded Mozzarella cheese

Brown meat (if using meat) and drain off grease. Add pasta sauce. Spread half of the sauce mixture over the bottom of a 13in. x 6in casserole dish. Place ravioli in a single layer over sauce. Add a layer of veggies. Add a layer of spinach (Keep in mind the spinach will cook down.) If you have any ravioli left add another layer. End with a layer of the remaining half of the sauce mixture and top with the mozzarella cheese. Bake on the middle rack for 30 minutes at 400.

* Veggies I have used and love are: sliced zucchini, sliced squash, mushrooms, shredded carrots, a bag of frozen California mix, and in a pinch I have made it with only the spinach. Use any combination you like!


Tuesday, February 15, 2011

Pressure Cooking

This post is not about the type of pot that my Granny uses to make most of her delicious home style meals, but rather about the insane amount of pressure that I put on myself when entertaining guests, more specifically new friends.

No offense to family members and already close friends, but you guys are easier to prepare for since I kind of already know your palate. For example, I know not to make a corn casserole if Naomi is coming to dinner, she wouldn’t touch it with a 10 foot poll, on the other hand if I make a cheesecake for a gathering on my side of the family, there is a good chance there won’t be any left over, so you better get in there and get your piece while it lasts. None the less, there is always pressure when cooking for good friends and family, too – I don’t feed ya’ll Hamburger Helper for goodness sakes!

But the real challenge does come when having people over that you have never eaten with before. I try my hardest in advance to find out if they have any food allergies or utter dislikes, but sometimes I don’t find that out beforehand and I am left to figure out a meal that I hope everyone will enjoy…or at least chew…okay, swallow.

Does anyone else put this kind of pressure on themselves to present a delicious meal for new friends and whip up something that leads to everyone clearing their plate (I do not like to throw away food)?  

Bring on the gluten allergy, vegetarians, dislike of onion, vegans….wait, never mind I can’t handle that one, but all other diet exceptions and exemptions, I am up for the challenge!
Kristen

Monday, February 14, 2011

Love is..

Love is…
love-is-66-1995
a sign that spring can’t be far away.
Love is...by Kim Casali

February is the shortest month of the year, but for me it always seems like the longest. It is dreary and gray and cold. I begin to hope for spring, but know that it is still far away. I find myself having a negative attitude in February; not everyday, but more than I would like. On these 'blah' February days I have to make a conscious effort to to be loving, and kind, and patient and many days I fall short.

But this weekend we got an early taste of spring. I spent quality time with my family enjoying the sun and mild weather.We went for a walk on Sunday afternoon and as my husband and I watched our son run ahead of us we mused about the future and reminisced about the "old" days; the dating days, the early marriage days, the pre baby days. We were married for many years before we had Little Man and I am truly thankful for the time we had just the two of us. We built a strong foundation for our family,but the love we shared then does not even compare to the love we know now. We love each other not just as husband and wife, but as Little Man's parents.

I meet this Valentine's Day with a truly joyful heart. When winter weather returns, as I'm sure it will, I will warm my heart and brighten my spirit by thinking of the reminder that spring will return and being thankful for those I love as I did this lovely Valentine's weekend.

Naomi

P.S.
That Love is... comic got me thinking about the original "Love is..." So, I thought I'd share a little reflection on Love. Happy Valentine's Day!


Love is patient, love is kind.
It does not envy, it does not boast, it is not proud.
It is not rude, it is not self-seeking,
it is not easily angered,
it keeps no record of wrongs.
Love does not delight in evil but rejoices with the truth.
It always protects,
always trusts,
always hopes,
always perseveres.

Saturday, February 12, 2011

Strawberry Frosting

This recipe post is going to differ a little than the ones we have listed here before.  Everything we have posted we have actually made, but I am going to go ahead and share this one for strawberry frosting that I am going to make today for some Valentine cupcakes.  I am going to pull a Sandra Lee (semi-homemade) trick and use a box cake mix (devils food) since my Saturday is jam packed and I need to have these ready for coffee fellowship at my church on Sunday morning.  I am going to make mini-cupcakes and top with this frosting – I am excited and will let you know how they turn out!
I got this recipe out of the cookbook Screen Doors & Sweet Tea by Martha Hall Foose and I plan on making several more things from it (pimento cheese, egg salad, red velvet cake…mmm).

Homemade Strawberry Frosting
½ cup chopped fresh or frozen strawberries
2 Tbs. strawberry jam
1 tsp. fresh lemon juice
1 (8 oz) pkg. of cream cheese, softened
1 ½ c. (3 sticks) unsalted butter, softened
4 cups confectioners’ sugar, sifted 
  1. In saucepan over medium heat, combine strawberries, jam, and lemon juice.  Stir for 5 minutes and until the jam is melted and the strawberries are soft.  Mush up any big pieces.
  2. With a mixer, mix the cream cheese and butter at medium speed until creamy. 
  3. On low speed, slowly add the confectioners’ sugar and mix till well combined.
  4. Add the strawberries and mix at low speed until blended. 
  5. Frost cooled cupcakes.
Kristen

Friday, February 11, 2011

I Love Us


Have you seen this year’s Hallmark Valentine’s Day commercial?  It brings a genuine smile to my face.

Kashi Heart to Heart Coupon


A great way to start the day and the little hearts make a great Valentine snack! Print a coupon for $1.50/1 Kashi Heart to Heart cereal or crackers here.

Easy No Bake Play Dough

I have made this play dough at home and at school. It’s a great DIY recipe for school because most classrooms do not have a kitchen and this recipe does not require cooking on the stovetop like many play dough recipes do. It’s also great at home because toddlers will inevitably have to taste their play dough. With this homemade recipe you know your little one is not eating any harmful chemicals.
This recipe makes a lot of play dough. If you’re making it at home I suggest making the cut down recipe below.

Full recipe:
1 cup cold water
1 cup salt
2 teaspoons vegetable oil
Food coloring
2 cups flour
2 Tablespoon cornstarch

Mix water, salt, oil, and coloring of your choice. Mix flour and cornstarch in separate bowl. Add dry mixture a ½ cup at a time to wet mixture stirring continually. Knead for a minute.
Dough is ready to play with!
Store in zip lock bag or air tight container.


At home I cut down the recipe and make more than one batch in different colors.
¼ cup cold water
¼ cup salt
½ teaspoon vegetable oil
Food coloring
½ cup flour
½ Tablespoon cornstarch

Naomi

Thursday, February 10, 2011

And then there were three…

I ‘officially’ met my husband six years ago this past January. I technically knew about him a year and half before, but that is a whole other story that I plan to tell later. We came face to face with each other at the top of a staircase in the student union at the university where we attended and I knew right away that God had some pretty special plans for us. I am actually that girl who called a friend to say “I think I just met my husband,” after our first encounter. Fast forward…we dated roughly a year and a half and have been married almost four and a half years.
Our Wedding Day - Aug. 6, 2006
 During one of those crucial conversations when we were engaged (for those of you who are married and/or engaged, you know the ones...topics include: money, faith, politics...the one’s that can make you sweat a little), we discussed a possible time line for adding children into the mix and our thoughts on exactly how many little ones we foresaw being in said “mix”. When we walked down the aisle and said our “I do's” we had planned on waiting to try for a baby until at least our fifth year of marriage since we were relatively young (21 going on 22). We have always continued to be on the fence about the number of babies, some days it is two and on days when we have had a little too much caffeine, we become a little over ambitious and we discuss possibly having three.

Well no surprise, we did not make it until our fifth year of marriage, but our precious bundle of joy was not a surprise either. Soon after our third anniversary we began talking about trying for a baby, even though it was not what we had originally planned. Both my brother’s and their wives and my husband’s brother and wife started families in the last year and a half and I definitely had baby fever. The funny thing was that the contagious fever was also caught by my husband. In the beginning weeks of August 2010, we talked and prayed together and decided that we had peace on the subject and we would try for the next two months. If we were unsuccessful at the end of 2 months we would stop and continue to pray and try a little later down the road. The Lord definitely knew the desires of our hearts and according to ultrasounds and the due date we most likely got pregnant on the first try, consequently my husband’s birthday! How is that for a birthday present!?
27 weeks pregnant
 Our son is now 8 months old and it feels that he has always been a part of our lives. I would not trade our lives for anything, but today I was thinking of some of those random things that I miss from our days as a duo. In no particular order here are a few…
1. Sleeping in past 7 am….uninterrupted sleep….okay, just sleep.
2. Leaving the house at the drop of a hat with only my purse in tow.
3. Staying out late (late = past 7:30 pm)
4. Flushing the toilet in the middle of the night…our house is very small and we do not chance waking the babe.
5. Less laundry.
 On the other hand, here are a few things that I would not trade about being a family of 3…
1. The equal partnership that my husband and I have when it comes to taking care of the baby. He rarely complains about and most often offers to do things like change a dirty diaper (cloth, folks), feed the baby breakfast or dinner, and assemble a new toy.
2. Waking up with both of my guys in the bed (becoming a weekend tradition in our house).
3. The special moments while nursing my son…how he stares up at me and strokes my chin and hair.
4. The inspiration my son brings to me each and every day. I know this is also true for my husband. He makes us better people.
5. The gratitude that I have come to understand through being a mother and even more importantly, a woman of faith. Not only has having a child made over our lives, it has also made over my heart in ways that I cannot even explain. My priorities have shifted and for the better.
 
Sometimes we lie in bed at night and recount our days as a couple and many of the fun things that we did, places we went, and freedoms that we enjoyed, but then we remember the precious boy that is asleep on the other side of the wall and our reminiscing is replaced with prayers of thanksgiving and excitement for what the future holds for our family of three.

Kristen
The TT

Wednesday, February 9, 2011

Paula Deen’s Chocolate Bundles with Chocolate Sauce


This is a decadent treat! But what makes it even better is that it is sooo simple to make.  I got this one from Paula Deen Celebrates! It is one of her Valentine’s Day recopies, so with the holiday quickly approaching I decided to give it a try.  I made a few changes to suit my taste and because I forgot part of the ingredients when I went to the store. I’ve noted my changes in the recipe.
Chocolate Bundles with Chocolate Sauce
Bundles
1 sheet frozen puff pastry dough
2 eggs
1 teaspoon whipping cream (an ingredient I forgot, so I just left it out)
8 chocolate Kisses
8 miniature chocolate candy bars (Paula recommends Snickers. I used Milky Way)
Chocolate Sauce
½ cup whipping cream
4 ounces milk chocolate broken into small pieces
(Forgot the whipping cream so I just skipped this step, but it would be oh so delicious.)
Garnish
Sweetened whipping cream
Sliced strawberries ( I used sprinkles because the strawberries just didn’t look ripe enough on my trip to the grocery store.)
(I used Cool Whip – again because I forgot the whipping cream- and sprinkles.)
1.       Preheat the oven to 350 degrees F. Line a cookie sheet with parchment paper.
2.       2. To make the bundles, allow the puff pastry to thaw, covered, for 30 minutes at room temperature. When it is pliable, unfold the pastry and cut the sheet into four 4x4 inch squares.
3.       Beat the eggs and cream together to make an egg wash. Brush the entire surface of each pastry square with egg wash. In the center of each pastry square, place 2 Kisses and 2 mini candy bars. Pull the corners of each square up around the chocolate, and twist the top of the dough clockwise to complete the “bundle.” Brush the exteriors of the bundles with more egg wash.
4.        Place the bundles on the cookie sheet. Bake about 35 min, until golden brown.
5.       Chocolate Sauce: In a small saucepan, bring the cream to a boil. Place the chocolate pieces in a bowl and pour the hot cream over the top. Whisk until the sauce is smooth.
6.       Puddle the chocolate sauce on a plate and place a bundle on top. Top with whipped cream and additional sauce. Serve the bundles garnished with strawberry slices!
Make this recipe for you loved ones on Valentine’s Day! I made this recipe this past weekend for some people we love very much and they agreed these bundles are absolutely rich and delicious.  While eating these bundles we came up with an alternate version you may want to try. Instead of the mini candy bars why not dark chocolate kisses and raspberry preserves! Have fun making your own version and let me know what you come up with!
Naomi

We Love it Wednesdays

Introducing "We Love it Wednesdays!" Each Wednesday we are going to share our favorite things with you: baby and toddler products, great finds, deals and freebies, and even indulgences for momma.

In case you haven't noticed, we spend a lot of time in the kitchen baking and cooking meals (Believe it or not we do eat more than desserts!). When Little Man became tall enough to reach the stove top I realized I had to toddler proof. I bought the TotShield Stove Guard and love it! I love it because you do not need to screw or glue it to the stove. It is easily removable and it works.
Naomi

Tuesday, February 8, 2011

Money Saving Tip - Haircuts

I had very long hair for a very long time.  Dull, boring, thick as a phone book, dirty blond hair.   I always wanted a stylish and hip hairstyle, but the easy bun and pony tail were just too hard to give up.  Plus, a long time ago when pixie cuts were all the rage, I attempted to have it done and it turned out awful and I believe that experience scarred me from ever having a decently short haircut. Laziness and my frugal nature also played a big role in not getting my hair cut in to a cute style; do you know how much haircuts cost these days?!  Where I live it is not absurd to pay $50 for a trim! I will admit that I have had 2 or 3 really good trims and paid $45-$50, but I financially cannot do that and don’t want to do that.  Paying that price means that I can only get my hair cut like once a year and trust me, my hair grows super fast and I would soon be looking like Cousin IT from the Adam’s Family.

Around Halloween time this past year my younger sister told me that she was getting her hair done at the cosmetology department at the community college that she attends.  I was nervous for the drastic cut and color that she was going to have done by a stylist in training, but low and behold it looked amazing!  And the kicker, to have your hair washed, cut, and styled only cost $10!!!  Shoot, if you didn’t want it washed and styled, only $5, but I think I could afford the five extra dollars to have my head massaged with salon shampoo (love that smell) and styled to perfection. I was immediately setting myself up an appointment to have my desperate tresses trimmed. In the week leading up to my appointment with the same girl that cut my sister’s hair, I decided that I was going to make a bold and drastic move and donate my hair to Locks for Love; I mean I had plenty to share and this was something that I had always wanted to do.  

The stylist in training cut 12 inches off to begin my transformation.  I was in utter shock, but the change felt good immediately.  While the haircut and styling took a bit longer than it might take in a typical salon, the outcome was awesome.  I must add that my husband loves my hair and actually said, “Keep it like this always please.”- I felt so beautiful in this moment.
I actually enjoyed the lengthy appointment and felt that I was in good hands because my stylist was really concentrating on what she was doing and asking her teachers for guidance when she had questions.  I have been back three times since that first haircut and each time I love going there more and more.  The same stylist does my hair each time and we have formed a friendship and she is now really comfortable cutting and styling my hair. Being able to (afford) keep my hair cut and styled regularly makes me feel so good on the inside and out. Plus, did I mention it is only $10?!?!  

If you have a local community college I would suggest finding out if they have a cosmetology school and make an appointment.  You could start with a safe simple trim and then work yourself up to more advanced styles as you got more comfortable.  This is a great way to save some major bucks and it’s only hair, right?!